
Here’s something most beginner artists don’t realise: 90% of the time when a charcoal drawing doesn’t look right, it’s not the artist’s fault… it’s the materials. Wrong charcoal type. Wrong paper. No fixative. The good news? Once you know what you’re working with, everything changes.
Whether you’re just picking up charcoal for the first time or looking to level up your toolkit, this guide has you covered. We’re walking you through 5 types of charcoal, 12 essential materials, 7 core techniques, a beginner project, brand recommendations, and … for our friends in Nigeria … exactly where to find these supplies. A lot of what’s listed here is available right here at Mbanugo Stores.
Let’s get into it.
What Is Charcoal Drawing? Definition, Benefits & Why It’s Perfect for Beginners
Charcoal Drawing Explained in 3 Sentences
Charcoal drawing is the art of applying burnt organic material,( usually wood) to paper to create tonal images. It’s one of the oldest drawing mediums in the world, and it remains one of the most beginner-friendly. Why? Because unlike ink or graphite, charcoal forgives mistakes easily … you can wipe it away, blend it out, or lift it with an eraser and start fresh.
4 Key Advantages Over Graphite & Other Media
- Erasability: Vine charcoal especially wipes off easily. Perfect for learning
- Value range: You can achieve a full 11-tone scale from bright white to deep black
- Speed: You can cover large areas quickly, great for gesture and figure drawing
- Versatility: Works on paper, canvas, wood … and even mixes with other media
5 Types of Charcoal Compared: Vine, Compressed, Pencils, Blocks & Powder
Not all charcoal is the same. Before you buy anything, it helps to know what each type does … and which one is right for where you are in your journey.
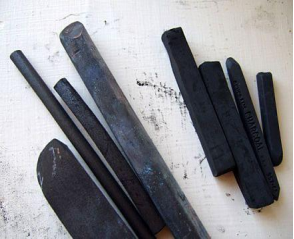
Shop Vine Charcoal at Mbanugo Stores
This is where almost every charcoal artist starts. Vine charcoal is soft, dusty, and wonderfully forgiving. It doesn’t dig into the paper, which means you can erase it almost completely and rework an area without a trace. Perfect for initial sketches and learning composition.
Compressed Charcoal: When to Use for Dark Shadows
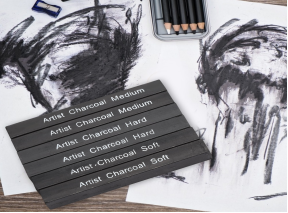
Shop Compressed Charcoal at Mbanugo Stores]
Compressed charcoal is vine charcoal’s bolder, more permanent sibling. It’s made by binding charcoal powder with a gum or wax binder, which makes it much harder to erase. Use it for your deepest shadows and final darks … not for your early layout stage.
Charcoal Pencils: Precision Detail Work
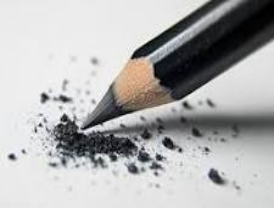
: Shop Charcoal Pencils at Mbanugo Stores]
Charcoal in pencil form gives you control that sticks and blocks can’t. Great for adding fine details to eyes, hair strands, or architectural lines. Brands like General’s and Staedtler are widely available and come in a range of hardnesses from H (light) to 6B (very dark).
Charcoal Blocks & Powder: Advanced Techniques
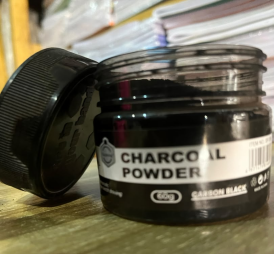
Shop Charcoal Blocks at Mbanugo Stores
Blocks are great for covering large areas fast… think dramatic skies or broad shadow regions. Charcoal powder lets you lay in an even base tone quickly, especially useful for atmospheric backgrounds. These are more of an advanced tool, but worth knowing about as you grow.
Vine vs Willow: Are They Actually Different?
Great question… and one that confuses a lot of people. The short answer: no, not really. ‘Vine charcoal’ and ‘willow charcoal’ refer to the same type of product. The difference is just the wood source used to make it. You’ll see both names on packaging and they behave essentially the same way.
Here’s a quick comparison to help you decide what to pick up first:
| Type | Erasability | Hardness | Best For |
| Vine / Willow | Excellent | Very soft | Sketching, layouts, learning |
| Compressed | Moderate | 2H – 6B | Rich darks, permanent shadows |
| Charcoal Pencil | Good | H – 6B | Fine detail, controlled lines |
| Charcoal Block | Low | Dense | Large areas, atmospheric washes |
| Charcoal Powder | Low | Very fine | Soft backgrounds, wet technique |
Essential Charcoal Drawing Materials: Complete Checklist for 2026
Starter Kit by Skill Level
You don’t need to spend a fortune to start. Here’s a simple breakdown by level:
| Level | Budget (₦ approx.) | Must-Haves | Nice to Add |
| Beginner | ₦15,000 – ₦25,000 | Vine charcoal, kneaded eraser, charcoal pad | 1 blending stump |
| Intermediate | ₦40,000 – ₦60,000 | All of the above + compressed + pencil set | Fixative, Mi-Tientes paper |
| Professional | ₦100,000+ | Full range of types, quality paper, fixatives | Nitram charcoal, chamois cloth, sandpaper block |
Erasers: Kneaded vs Vinyl vs White Stick
Your eraser isn’t just for fixing mistakes… in charcoal, it’s actually a drawing tool. You’ll use it to pull out highlights, soften edges, and create texture. Here’s how the three main types compare:
| Eraser Type | Best For | Precision | Reusability |
| Kneaded Eraser | Lifting highlights, soft removal | High (shape it yourself) | Very high — lasts a long time |
| Vinyl / Plastic Eraser | Clean edges, full removal | Medium | Good |
| White Stick Eraser | Precise lines, small areas | Very high | Moderate |
Our top pick:
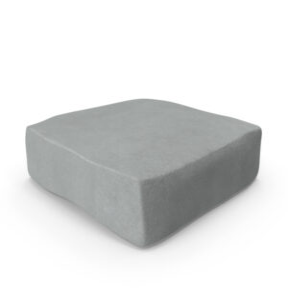
Shop Kneaded Erasers at Mbanugo Stores
the kneaded eraser. You can mould it into any shape you need, and it won’t damage your paper’s surface. Pick one up at Mbanugo Stores.
Blending Tools: Blending Stumps vs Tortillions
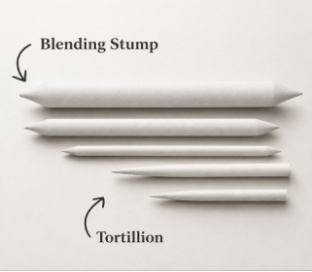
Shop Blending Stumps at Mbanugo Stores
Both look like rolled paper sticks, but there’s an important difference: tortillions have a ridged, cone-shaped tip… which can create inconsistent blending. Blending stumps are smooth on both ends and give you cleaner, more even results. When in doubt, go for the stump.
Pro tip: when your stump gets too dark from use, just rub it on a piece of sandpaper to refresh it.
Paper Selection: Tooth, Weight & Texture Explained
Charcoal needs paper with ‘tooth’… a slightly rough surface that grabs and holds the charcoal particles. Smooth paper won’t hold much charcoal and will give you a very different result than expected. Here’s how common paper types compare:
| Paper Type | Texture (Tooth) | Best For | Popular Brand |
| Charcoal Paper | Medium-high | Most charcoal work | Strathmore, Canson |
| Cold-Press Watercolor | Medium | Wet charcoal technique | Arches, Fabriano |
| Vellum Bristol | Smooth | Charcoal pencil detail work | Strathmore Bristol |
| Toned / Mi-Tientes | Medium | Portraits, adding white highlights | Canson Mi-Tientes |
Shop Charcoal Paper Pads at Mbanugo Stores]
Fixatives: Workable vs Final (A Critical Difference Most People Miss)
Fixative is a spray that seals your charcoal so it doesn’t smudge or fall off. There are two types, and they’re not interchangeable:
- Workable Fixative: Seals your work but still allows you to draw on top. Use this during a session, roughly every 30 minutes of work.
- Final Fixative: Fully seals the drawing and makes it permanent. Use this only when you’re completely done.
Always spray outdoors or in a well-ventilated area.
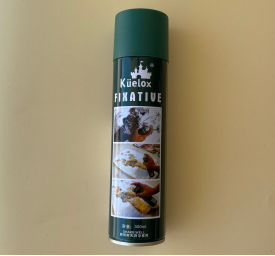
Shop Charcoal Fixative Spray at Mbanugo Stores]
Bonus Tools: Brushes, Sandpaper & Chamois Cloth
- Soft make-up brushes: Excellent for broad, soft blending across large areas
- Sandpaper block: For sharpening your blending stumps and vine charcoal to a point
- Chamois cloth: A soft leather cloth for creating very smooth, seamless transitions
7 Core Charcoal Drawing Techniques: Step-by-Step
Knowing your materials is half the battle. The other half is technique. Here are the 7 essential ones every charcoal artist should know:
Technique 1: Hatching (Parallel Lines for Shadow)
Draw parallel lines at roughly 45° angles to build up shadow. The closer the lines, the darker the area. This is a controlled, structured way to add tone without blending.
Technique 2: Cross-Hatching (Deep Shadows)
Layer a second set of hatching lines over the first, going in a different direction (usually 45–90° apart). This creates richer, denser darks …great for fabric folds and deep shadow areas.
Technique 3: Scumbling (Loose, Atmospheric Texture)
Make loose, random circular marks with your charcoal. This creates a soft, irregular texture perfect for clouds, weathered surfaces, or background effects. Don’t overthink it … the looseness is the point.
Technique 4: Blending (Smooth Gradients)
After applying charcoal, use a blending stump, chamois cloth, or even your finger to smooth it out. Ideal for skin tones, smooth surfaces, and any area where you want a soft, seamless transition.
Technique 5: Stippling (Dot-Based Texture)
Apply charcoal as small dots rather than strokes. Cluster them closely for dark areas, spread them out for lighter areas. This is slow and meditative … great for very fine, detailed textures like animal fur or stone.
Technique 6: Lifting / Subtractive Drawing (Eraser as Tool)
This is the technique that makes charcoal magical: instead of always adding marks, you remove them. Use a kneaded eraser to ‘draw’ light back into a dark area. Think of your eraser as a white pencil. Plan your highlights early so you’re working around them from the start.
Technique 7: Directional Stroking (Follow the Form)
Apply your marks in the direction that the surface actually flows. For hair, stroke in the direction of growth. For a cylinder, wrap your strokes around the curve. This simple habit makes your drawings feel three-dimensional instantly.
Practice Drill: The 10-Step Value Scale
Before every session, draw a row of 10 boxes and fill them from white to pure black in even steps. This trains your hand to control pressure and helps your eye see value relationships clearly. It takes 5 minutes and makes a noticeable difference over time.
Beginner Project: Draw a Sphere in Charcoal (Step-by-Step Tutorial)
The sphere is the classic beginner project for good reason …it teaches you value, shadow types, light direction, and the lifting technique all in one exercise. Here’s everything you need and how to do it.
Materials Needed
- Vine charcoal (1 stick)
- Compressed charcoal pencil (1 pencil)
- Kneaded eraser
- Blending stump
- Charcoal paper
7 Steps to Complete the Sphere
- Lightly sketch a circle with vine charcoal. It doesn’t need to be perfect — just roughly round.
- Mark your light source with a small arrow outside the circle (e.g., top-left corner).
- Block in the shadow zone on the opposite side with your vine charcoal. Leave the highlight area completely untouched.
- Blend the first layer with your stump using soft circular motions.
- Add your core shadow and a subtle band of reflected light along the bottom edge using compressed charcoal. Do not blend into the highlight area.
- Draw the cast shadow on the surface below the sphere… it’s darkest right where the sphere sits and fades as it moves away.
- Use your kneaded eraser to gently dab and lift the highlight area back to bright white.
What You Learned
By completing this one exercise, you’ve practised: value building, the lifting technique, the difference between core shadow and cast shadow, and how reflected light works. These same principles apply to every subject you’ll ever draw …a face, a still life, a landscape. The sphere is the foundation.
Where to Buy Charcoal Drawing Materials in Nigeria
Finding quality art supplies in Nigeria is getting easier. Here are your best options:
At Mbanugo Stores
We stock a range of charcoal drawing materials right here in store. From vine charcoal and blending stumps to fixative spray and charcoal pads… if you’re in Nsukka, come in and see us. Our team can help you put together a starter kit based on your budget.
[IMAGE: Visit Mbanugo Stores — Art supplier in Nsukkat]
Online Options
- Jumia Nigeria: Good for basics … search ‘charcoal drawing set’ for beginner bundles
- Amazon with delivery to Nigeria: Better brand selection for intermediate and professional materials
- Etsy: Great for specialty papers like Mi-Tientes if you can’t find locally
Cost-Saving Tips for Nigerian Artists
- Start with just 3 vine charcoal sticks + 1 charcoal pencil. That’s all you truly need to begin.
- A hardware store sanding block works just as well as an art store sandpaper pad at half the price.
- Tape your paper to a smooth piece of cardboard or an MDF board instead of buying an expensive drawing board.
- Make-up brushes from the beauty supply section blend charcoal beautifully at a fraction of the cost of dedicated art brushes.
Charcoal Maintenance & Storage
Cleaning Your Blending Stumps
When your stump gets too loaded with charcoal, it stops blending and starts smearing. Fix it by rubbing the tip firmly against a sandpaper block or fine-grit sandpaper. You’ll reveal a fresh, clean surface underneath. The same trick sharpens the tip back to a point.
Storing Charcoal Sticks & Pencils
Store vine charcoal sticks flat in a box or portfolio … standing them upright can cause them to snap. Keep vine and compressed charcoal in separate compartments since compressed charcoal can transfer its pigment. Avoid storing charcoal near electronics, as the dust can get into devices.
Preventing Smudging & Dust Damage
Never stack finished or in-progress drawings directly on top of each other. Place a sheet of glassine paper or wax paper between them. Spray workable fixative after every session… even if you plan to continue the next day. It takes 30 seconds and could save hours of work.
Troubleshooting: Common Charcoal Problems & How to Fix Them
Problem: Your Drawing Looks Weak or Grey
Cause: You haven’t established your darkest dark yet. In charcoal, many beginners stay in the ‘mid-grey’ range because pressing hard feels risky. Fix it by committing to a truly dark area … with compressed charcoal at full intensity … within the first 20 minutes of your session. Once your darkest dark is in, every other value falls into place naturally.
Problem: Muddy, Overworked Appearance
Cause: Over-blending. When you blend everything, nothing stands out and the drawing loses definition. Fix it by only blending areas that genuinely need smooth transitions (skin, sky, smooth objects). Let hatching or visible strokes remain where texture is appropriate.
Problem: Highlights Won’t Lift
Cause: You tried to erase back too late, or the charcoal is too compressed. Fix for next time: plan your highlight areas before you start and consciously work around them. For now, try a white chalk or white charcoal pencil to re-establish those lights on top of the dark.
Problem: Proportions Look Off
Cause: Rushing the layout stage. Spend 20–30% of your total drawing time on the initial layout … measuring, comparing, adjusting …before you add any tone. Vine charcoal is perfect for this stage precisely because it can be wiped away completely.
Modern Techniques: Digital-Hybrid & Mixed Media (2026 Update)
Digital-Hybrid Workflow: Plan in Procreate Before Paper
A growing number of artists now use Procreate or Photoshop to plan their composition digitally before touching paper. You can test your value arrangement, crop options, and light source digitally, then print your reference with adjusted values. This saves a lot of time and paper.
Wet Charcoal Technique: Water + Powder = Ink Effect
Mix charcoal powder with a small amount of water to create a painterly wash effect. It looks almost like ink or watercolour and is stunning for loose, expressive work. Important: use archival paper designed to handle moisture (like cold-press watercolour paper) to prevent buckling.
Mixed Media Combinations
- Charcoal + white chalk on toned paper: Instantly expands your value range in both directions
- Charcoal + graphite pencil: Use charcoal for broad tones and graphite for fine, sharp details
- Charcoal + ink: Add ink lines for crisp accents after the charcoal work is done
FAQs: 7 Questions About Charcoal Drawing Materials Answered
What charcoal is best for beginners?
Vine or willow charcoal, without question. It’s the most erasable type, which means you can learn freely without fear of permanent mistakes. Start with a small pack of vine charcoal sticks and a charcoal paper pad.
How do I prevent charcoal from smudging?
Spray workable fixative after every session …even if you plan to keep working on the piece later. For finished drawings, apply a final fixative and store with glassine sheets between pages.
What paper works best for charcoal drawing?
For most work, textured charcoal paper from brands like Strathmore or Canson is the go-to. For portraits specifically, the smoother side of Canson Mi-Tientes is a favourite among artists.
Can I mix charcoal with other media?
Yes, and it can be beautiful. Charcoal works well with graphite (for added detail), ink (for crisp accents), white chalk (for highlights on toned paper), and even as an underdrawing for watercolour.
How much do charcoal drawing materials cost?
A solid beginner kit can be put together for around ₦15,000–₦25,000. Intermediate setups run ₦40,000–₦60,000, and professional-grade materials can go from ₦100,000 upward depending on brands and quantity.
Where can I buy charcoal materials in Nigeria?
Right here at Mbanugo Stores in Nsukka… pop in and we’ll help you find what you need. Online, mbanugo stores is a good starting point, and Amazon ships select products to Nigeria for more specialised items.
How long do charcoal drawings last?
With proper fixative application and careful storage, a charcoal drawing can last 50 years or more. Without protection, charcoal can smudge or fade within 5–10 years due to dust and handling.
Key Takeaways: 7 Essential Charcoal Drawing Tips
- Start every session with a 10-step value scale exercise to warm up your hand and eye.
- Use vine charcoal for sketching and layouts; switch to compressed charcoal only for your darkest finals.
- Your eraser is a drawing tool…use it to lift highlights, not just fix mistakes.
- Establish your darkest dark within the first 20 minutes to anchor your entire value range.
- Plan highlights from the very beginning … working around them is always better than trying to erase back later.
- Spray workable fixative regularly during sessions to protect your progress.
- The sphere project is the single best beginner exercise …value, shadow, light, and lifting all in one.
Conclusion: Start Your Charcoal Journey Today
Charcoal is one of the most expressive, forgiving, and rewarding drawing mediums you can pick up … and it doesn’t require a huge investment to get started. Three vine charcoal sticks, a kneaded eraser, a blending stump, and a pad of charcoal paper are genuinely all you need to begin.
At Mbanugo Stores, we’re here to make sure you have access to the right materials without the confusion. Whether you’re a complete beginner or an experienced artist building out your toolkit, come in and see us or shop online.
�� Browse our charcoal drawing materials at Mbanugo Stores
Happy drawing! ��